Tulasi Worship
Tulasi Worship
In this section you will find all the information needed to cultivate, care for and worship Tulasi Devi in your home or temple. The information in these pages has been reproduced with the kind permission of Lilavati devi dasi from her book “The Science of Growing Srimati Tulasi Devi – A Practical Guide.”
In the Skanda Purana there is a statement praising the tulasi tree as follows:
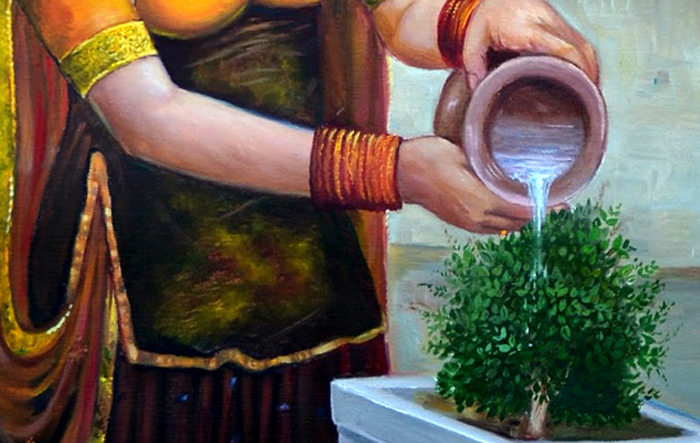
“Let me offer my respectful obeisances unto the tulasi tree, which can immediately vanquish volumes of sinful activities. Simply by seeing or touching this tree one can become relieved from all distresses and diseases. Simply by offering obeisances to and pouring water on the tulasi tree, one can be free from the fear of being sent to the court of Yamaraja (the King of death, who punishes the sinful). If someone sows a tulasi tree somewhere, certainly he become devoted to Lord Krsna. And when the tulasi leaves are offered in devotion at the lotus feet of Krsna, there is the full development of love of Godhead.”
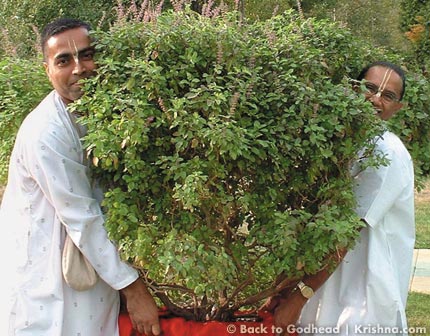
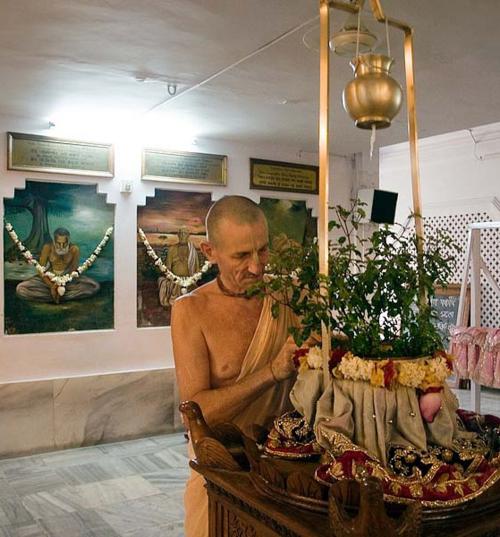
In India all Hindus, even those not belonging to the Vaisnava group, take special care of the tulasi tree. Even in great cities where it is very difficult to keep a tulasi tree, people are to be found very carefully keeping this plant. They water it and offer obeisances to it, because worship of the tulasi tree is very important in devotional service.
In the Skanda Purana there is another statement about tulasi, as follows:
“Tulasi is auspicious in all aspects. Simply by seeing, simply by touching, simply by remembering, simply by praying to, simply by bowing before, simply by hearing about, simply by sowing this tree, there is always auspiciousness. Anyone who comes in touch with the tulasi tree in the above-mentioned ways lives eternally in the Vaikuntha world”.
(Srila Prabhupada. The Nectar of Devotion, Aspects of Transcendental Service, p 99)
Growing Tulasi From Seed
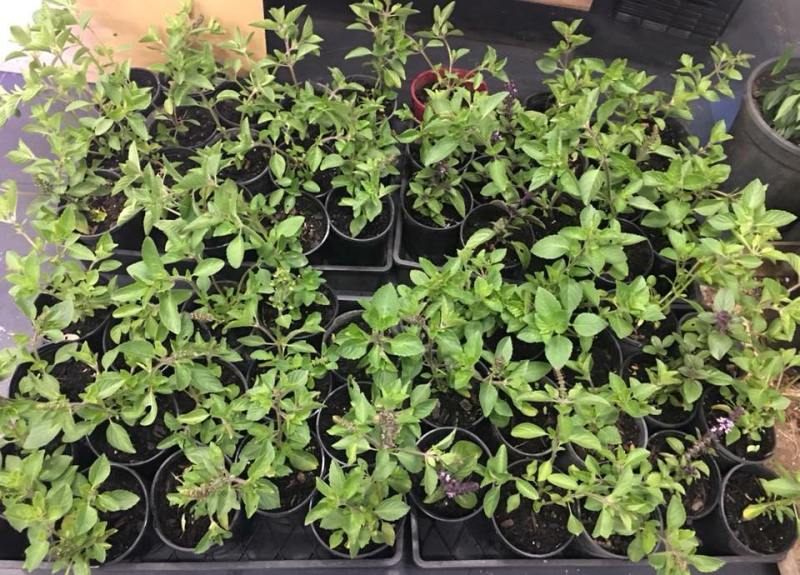
To grow Tulasi from seed can be very rewarding. It is said that Tulasi will grow where there is devotion. However, the most common problem I hear from devotees of Srimati Tulasi devi is, “Why will Tulasi devi not come to me?” – “What am I doing wrong?” – “Is it me?” – “Am I just not devotional enough?” – and so it goes! If you have the same anxieties, then lets stop for a moment and consider just how merciful Tulasi is and from this state of grace how we can receive new insights. Instead of confusion, let’s look at some of the practical sides as to why it can be difficult to grow her from seed.
Tulasi seeds will germinate quite nicely if they have been stored in an air tight container and kept in a cool dry place. The life expectancy of seeds can vary depending on how they are stored. I have successfully grown seeds over four years old. Seeds will deteriorate if left out in the open or in a greenhouse as they would be subjected to both unfavourable temperature and humidity levels. Other factors are due to seeds becoming damaged in transit – sown too deeply, imbalance in moisture, light or heat or the wrong choice of soil.
If the seed is good and the correct growing conditions are established, add a dash of love and Tulasi will flourish. Ask yourself these questions when sowing seeds do you have enough space, height/width for Tulasi to grow on to a mature plant? Will she receive enough sunlight and humidity? For home worship it is best to sow only one or two, unless you have adequate space to grow her.
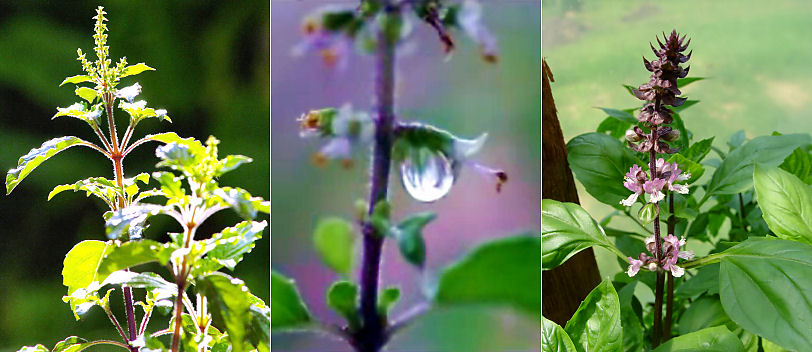
Development Of A Manjari From Flower To Seed
A Tulasi manjari first starts to develop from a small bud with two small leaves, one either side of the bud. Once this bud starts to grow up into a point of about 2cm the individual clusters, or whorls which will develop from buds into sets of six flowers, can be seen more clearly as the manjari grows. As Tulasi devi’s flowers contain both male and female parts, she does not need a pollinator as they self-fertilise. Once the flowers have reached full bloom the petals fall away leaving a green coloured pod called a calyx. This pod will eventually swell slightly and become harder. It is at this time that the ovary inside the flower pod is developing into four tiny yellow nutlets, which will in time mature into brown seeds.
If you wish to collect seeds, wait for the whole process to complete before taking the manjari off the Tulasi. If you look down into the pod (calyx) and observe you will see the tiny yellow nutlets. Allow them to turn brown. If the manjari is taken off before the process is complete, it will not have had time to ripen the seeds to full maturity. When it’s time, carefully take the manjari off and store whole in an air-tight container in a cool dark place.
Soil
There are many brands and soil types available on the market today. For healthy plants it is important to have the correct pH level. The pH levels in soil range from pH7 which indicates “Neutral”. Above pH7 level indicates “Alkaline” (sweet). Below pH7 indicates “Acid” (sour). As Tulasi is related to the basil family, her requirements are for pH5.5 – 6.5.
The best soil recommended for growing Tulasi on the commercial market in England has the brand name “J. Arthur Bower’s John Innes No 2 Compost”, which is sterilized, has good drainage, a good pH level and is also completely free of animal by-products. Tulasi will grow strong and healthy and also grows from seed in this brand type.
Soils to avoid are those which contain sawmill by-products (poor drainage), sludge (a by-product of sewage treatment) and any which contain bone-meal, fish blood and bone or hoof and horn. Soil straight from the garden may contain disease spreading organisms.
For those who wish to make their own soil:
2 parts potting soil
1 part compost
1 part mason’s sand – to improve drainage
1 tablespoon of pulverized phosphate rock
1 tablespoon of potash
Mix all ingredients well
Planting The Seed
Always use clean containers as there is no point in using sterilized soil if it is going to be put into a container which isn’t itself free of possible sources of plant disease. A small propagator is really worth the money as they come with their own lids and air ventilators.
Whether using a propagator, seed tray, plastic bag or peat moss cups (which have been soaked first in water) place in seed compost and press down gently to firm in. Water the soil using a watering can with a fine rose cap and leave to drain through. Soil needs to be moist but not soggy. Next place the seed on top of the soil and cover lightly with very fine soil which has been passed through a sieve. The seed needs to be just barely covered so that it does not get lost under too much soil. Using a very fine mist spray, gently spray the top soil once or twice. Then, if using a seed tray or peat pots cover with glass or clean polythene bag. Place in a warm position with some sunlight; avoid really strong sun as it could burn the germinating seedlings. Wipe condensation from the underside of the glass daily and leave a small gap for air to circulate.
Once germination has taken place, which can take as little as 4-5 days or as long as 3-4 weeks depending on time of year sown, remove the glass or bag and place the Tulasi in a warm position where she will receive gentle sun. Once Tulasi has grown three sets of leaves, she will be strong enough to transplant on to her own little terracotta pot. (See illustration on page 11)
To Prune Or Not To Prune
When growing any shrub, bush or small tree, it is common practice to cut them back for a number of reasons. These can range from strengthening or thickening them out, or if overgrown, to reduce height and width. In cases of disease, cut down the foliage almost completely. In ornamental gardening the natural shape and beauty of the bush, hedge, or tree is lost altogether to make way for whatever design suits the fashion of the day. However, when growing Srimati Tulasi devi this practice is not used.
Once the Tulasi has germinated, she will continue to grow in an upward direction developing two new sets of leaves every 2cm or so, until she forms her first manjari. As this upward motion is continuing, smaller buds will develop at the stem next to the two sets of leaves which will form side branches. On removal of this first manjari the side shoots down the main stem, and also at the top of the stem, will develop into the new branches. This can make the main base stem quite tall, resulting in further growth of the top side shoots. If she receives the right growing conditions and providing there’s no problems with disease or pests, the end result will be a beautiful tall Tulasi tree, with a life expectancy between five to fifteen years. This is why it is important to plan ahead.
Do you have a big enough space to support this growth? If not but you still wish to grow her, then perhaps consider whether you have enough width for a low bushy Tulasi.
The only form of shaping which is allowed on Tulasi devi, without causing any offence, is to pinch out the apical growing point at the top of the stem. This will reduce her growth upwards. The small shoots at the side of the stem will grow into two separate branches. Once these branches have produced 3 or 4 sets of leaves, you can pinch out the apical growing points again and this will result in two more branches. Tulasi devi will then grow to become quite bushy. Tulasis which are very tall with a single stem measuring two or three feet in height, with foliage at the top, can be the results of not pinching out the apical growing point at the beginning stages.
If the Tulasi shows signs of disease on one side of the branch and the wood is dead, as in “Die-back”, then it is appropriate to remove the affected branch to save the rest of the foliage. (Die-back is the result of disease in the root system, which causes the leaves to suddenly go limp and wilt, starting from the top of the foliage and working its way down the branch).
During seasonal changes, Tulasi devi will require careful monitoring as her need to absorb water will vary according to the time of year. Watering is best done early morning, before 8am, to meet the demands of photosynthesis. Some will dry out quicker than others. Check for: pot size, soil type, size of foliage, temperature and humidity. This will give indications as to how quickly she will absorb water. The following guidelines are recommended.
Check the topsoil by hand, carefully feeling with your fingers to see if the soil is dry, you can go down 2-3 inches in large pots. Water thoroughly so that the water runs out of the hole in the bottom of the pot. This will ensure the root ball system is completely soaked through. Then leave soil to dry again. It can be difficult to estimate how long this will take, as weather, season and environment will dictate conditions. To prevent Tulasi from sucking water up from her root system at the base of the pot, place the pot on blocks to allow the water to run through freely. Good drainage is crucial to Tulasi’s health, (see illustration on page 22). Never let her sit in water.
Always ensure water is left to stand overnight before use. This allows any chlorine and other chemicals to dissipate and also allows water to reach room temperature. If the water is very cold t will cause problems to the roots, and this in turn will show on the foliage.
Over-Watering
If the soil is over-watered there will be too much moisture. The hair roots which take in the nutrients will not be able to breathe. This is because the water has filled all the air spaces. This in turn damages the root system causing root-rot. Tulasi devi will show no immediate signs but within a week some of the lower leaves will go yellow and she will look miserable as she is in stress. The leaves will become pale and turn brown on the edges. Once root-rot sets in, it can take a long time for her to regain her strengths. In some cases, if over-watering has gone on unchecked for too long, the root system will become diseased and there will be little hope of salvage. All that can be done at this point is to take her out of the pot, remove what you can, change the soil, lightly water and wait.
Under-Watering
If the soil is left too dry, Tulasi leaves will appear limp and dropping. Then upon receiving water within 48 hours she will drop healthy green leaves. This is caused by her roots shrinking due to lack of moisture and then going into shock when eventually watered. If this goes on unchecked for too long, she will leave her body as this condition causes too much stress to the root system. Another form of under-watering is when not enough water is given. The Tulasi leaves will droop, the top soil will show moisture but the bottom half of the soil still remains dry. This is very stressful to Tulasi and also to the one who is watering her, as you will be reading two different signals.
Seasonal Changes
Spring
During the early part of spring Tulasi will begin to awaken from her dormant winter condition in which she takes rest. New growth will appear slowly and the soil will start to show signs of drying out more as Tulsa’s fibrous root system absorbs more moisture. This can take between 4-5 days on average depending on the pot and size of foliage. As the season moves into late spring Tulasi starts to grow more quickly as the climate warms towards summer. The soil will then dry out on average between 3-4 days.
Summer
During summer months when the sun is at its hottest, temperatures can reach over 110° F under glass in the greenhouse. As an average guide, in the height of the summer expect the soil to dry within 2-3 days. This is not only due to the heat but also because most of Tulasi’s energy goes into producing Manjaris at an incredibly fast rate. It is therefore essential to monitor each Tulasi individually and on a daily basis as she will dry out very quickly.
Autumn
During the cooling autumn months, Tulasi gradually begins to slow down her rate of growth and produces less Manjaris. As the weather cools she will absorb less water and the soil will stay moist longer. An average guide at this time of year for watering is generally every 3-4 days especially as the season moves towards late autumn.
Winter
It is during the winter months that Tulasi takes her rest and becomes dormant. Her need to absorb water is greatly reduced. An average guide at this time of year for watering can vary between 5-6, even 7 days, depending on the individual Tulasi and pot size. Great care needs to be taken at this time as over watering can cause serious problems to her root system.
One last word on watering: The above are guidelines only. As you get to know your Tulasi you will develop an inner response to her needs. As time goes by you will be shown by her appearance if she looks happy and healthy then you’re in touch with that response. If she looks sad and in stress then you’re missing something. Go through the list of possible causes and make any adjustments needed.
Humidity And Spraying
Whether you are growing Tulasi at home on a window ledge, patio, or greenhouse it is very important to maintain humidity levels.
As Tulasi is growing in an artificial environment it is essential to replicate Mother Nature to our best ability. Indoors or under glass, Tulasi’s foliage needs to be sprayed every day with water using a fine mist spray as this substitutes the morning dew. Tulasi absorbs water sprayed directly onto her leaves, this also helps raise the humidity level and helps prevent her leaves from curling or dying out. It is also beneficial to raise the pot on blocks and place in a large tray or saucer, which has been covered with perlite “sponge rock” or gravel. This will make it easier to water, with the excess water being allowed to run freely and collect in the tray, which will also increase the humidity levels. Check occasionally to make sure that Tulasi’s roots are not protruding out from the bottom of the hole in the pot and trailing in the water. If this occurs and goes on unchecked she will absorb too much water and go brown on the leaf tips, causing damage to the root system.
Iron and Feed can be added to the Tulasi spray bottle twice a month on alternate weeks during spring and summer and once a month during autumn. No Iron or Feed is given during the winter months as Tulasi becomes dormant at this time.
Temperature
Spring
During the growing season Tulasi devi appears to grow best with the temperature at around 75-80° F in the day and 60° F at night. Whether sitting on a window ledge or in a greenhouse, some windows can be opened during the daytime for ventilation but be sure to close them at night. There may still be signs of ground frost in the early part of spring. Avoid too much draft.
Summer
During the summer months Tulasi grows strong and healthy producing many manjaris. It would be quite a refreshing change for Tulasi if she is placed outside in her pot during the best part of summer. She will be fine left out over night. Care and consideration would need to be taken during any sudden freak storms. A Tulasi which has been grown under glass may not be as robust as a Tulasi grown wild in India. Also avoid any rough handling or heavy bangs to the pot as this can cause shock to the root system. However, if this is not practical due to the area in which you live, she will grow just as well indoors.
In the height of the summer during mid-day the temperature in a greenhouse can increase to over 110° F. This in turn can cause Tulasi some stress. To reduce this partially shade the outside of the greenhouse glass on the roof. This is done with “Cool-Glass” or “White-Out”, which s a powdered substance that is mixed with water and sprayed or painted directly on the outside of the glass roof (top panes only). This allows Tulasi to still receive sunlight, but not enough to singe her leaves or scorch her roots. Alternately, sun screens can be fitted on the inside of the glass roof and operated when needed by hand. Temperatures at night on the inside are comfortable of Tulasi at 55° F to 60° F but only during summer conditions. No heating is required at night during the summer months.
Autumn
Autumn temperature requirements are 75-80° F during the day and 60° F at night. If Tulasi is next to a window open during the day and close at night as the season moves closer to winter.
Winter
During winter months it is crucial that the temperature does not fall below 55° F. Day time temperature needs to be 75-80° F and night-time 60° F to be safe. Tulasi is extremely sensitive to the cold. Whether grown at home or in a greenhouse she will require a heater. Check that all windows are closed at night as the winter draft can kill her overnight.
Re-Potting
To help prevent Tulasi wilting or getting stressed, never re-pot in full sun or during the heat of the day. The best time is on a cool day, or when the sun has dissipated, around 4pm.
Tulasi grows best in unglazed clay pots, as they allow for air movement through the sides of the pot. Avoid glazed or plastic pots because the air cannot penetrate.
Tulasi devi will let you know if she is “pot-bound” (in need of re-potting), by one of the following signs.
When her roots are coming out of the drainage hole at the bottom of the pot.
Shows signs of slight wilt hours after she has received water. (This indicates it is past the correct time for re-potting). Tulasi will then need to go into a pot much bigger than the normal potting on size, which is one size up.
Lower leaves get sickly yellow. (A plant shares what nutrients and water it can absorb with its growing tips first so the older leaves suffer).
Leaf size gets smaller.
To Check If Tulasi Requires Re-Potting
Water first and allow to drain completely.
If the Tulasi to be re-potted is small, take the pot in one hand under the bottom and place the open fingers and palm of the other hand on the dirt at the base of the stem. Turn upside down. Place a stick or your finger in the hole at the bottom of the pot (it should rest against the crock inside) then push. Tulasi and soil should come out in one action.
If she does not drop out into your hands bring the pot upright again and run a pallet knife carefully around the sides to release any little roots which may have stuck into the pot. If the roots have not filled the pot then just put her back in the same pot. If the roots completely fill the soil area so the root ball is in the shape of the pot it is time to re-pot. If the root ball looks solid and you can see those strong white roots, Tulasi is healthy and you can move to the next step.
When examining a sick Tulasi, if roots look black and soft and the root ball smells sour, then root-rot is indicated. Remove what you can and re-pot but be prepared as there may be little hope of salvage.
To Re-Pot
Soak the new clay pot in water until the bubbles stop. (New pots are porous and will draw water from the soil and the plant if not soaked first.)
Prepare new pot by putting “crock” (broken pottery) in the bottom of the pot making a small bridge over the drainage hole. This keeps the soil from running out and allows water to drain out.
Place enough fresh soil in the bottom of the pot over the crock to allow Tulasi to sit in pot at the right height.
Take Tulasi from old pot using above method. Gently loosen soil, removing any old crock and carefully separate and straighten any roots that have circulated in the old pot. Place Tulasi in new pot.
Keeping the Tulasi central and straight, add more soil up to the same marking on the stem as before. Water in and add feed to the soil to help her recover from the shock of transplanting. Place her in the shade for a few days to help her settle. Then place her back in the sun.
If the Tulasi to be re-potted is far too big to be taken out by previous method and it is quite evident that she is in need of re-potting, then use following instructions; Prepare new pot as above. Water the Tulasi first and allow to drain.
Lay plastic sheeting on the floor. Lay the Tulasi on it taking care not to damage her branches. First try pushing her out firmly with a stick as above. If this is too difficult you will have to break the pot. Using a hammer and a folded up cloth to absorb the shock of impact, hit the side of the pot and remove. Follow steps 1-6.
Depending on how Tulasi grows, at some point you may need to use support sticks. It can be quite damaging to Tulasi’s roots to push any support stick in the soil next to her stem. The best method to use in to place either bamboo cane or plastic coated steel rods in the soil at the edge of the pot and then secure the stem to the support stick with fine string, or if you prefer, thin ribbon.
Nutrition
All plants need vital nutrients if they are to grow healthily. The three major plant foods which are essential to plant growth are:
Nitrogen (N) derived from nitrates or ammonia.
Function: To give plants their dark green colour and helps the growth of leaves and stems.
Phosphorus (P) derived from ground rock.
Function: Root development – encourages blooming and seed formation.
Potash (K) derived from seaweed and wood ash.
Function: Strengthens resistance to disease and poor conditions. Stimulates flowering.
Tulasi will need the additional supplemental nutrients to be added to the soil to help replenish the nutrients as she uses them. Feed and Iron are essential to her health and growth.
Avoid fertilizers containing ingredients from sewage treatments or slaughter houses. Bone Meal, Dried Blood, Hoof and Horn, Fish Compound. You may find the list below helpful when making your choice.
Maxicrop Complete Garden Feed.
This general all-purpose fertilizer has a natural, organic seaweed extract base to which have been added Nitrogen, Phosphorus and Potash. The source of nitrogen is urea derived from heating ammonia and carbon dioxide by very high pressure. Apply when watering as a root drench during spring and summer fortnightly.
Miracle Grow
The nutrients from this product are also derived from ground rock and natural ingredients. Follow instructions on the label.
Multi Tonic
This is an all round tonic, good for the soil after the winter, which is applied in early spring. One application will normally last all season. This adds vital trace elements to the soil. Ingredients are: Sequestered Iron � which cannot be chemically locked up or washed out of the soil and is therefore steadily released to the plants over a long period. Ingredients: Manganese, Magnesium, Zinc, Boron, Molybdenum Copper, and Sulphur.
Maxicrop Sequestered Iron
This is for Tulasi’s Iron intake and for the prevention of yellowing (chlorosis). Again, this product has a natural organic seaweed extract base with the addition of Ferrous Sulphate and Trisodium Citrate. The former is a by-product from steel production and the latter is obtained from glucose and molasses. This is added to the soil when watering and also use das a foliage spray. Again, like the feed, give fortnightly.
Maxicrop Plant Growth Stimulant
This product is a pure seaweed extract and is totally natural and organic and has the approval of the Soil Association.
Maxicrop products do not contain derivatives from slaughterhouses or sewage treatment works.
Cow Manure
If using cow manure, only use if it has aged for a year as when fresh it burns the roots.
Use 1 part dry manure to 3 parts water – let it stand overnight, then dilute to a weak tea colour. Use fortnightly. Cow manure may not always be enough because Tulasi will still require other nutrients. The fertilizer brands above come complete and are easier to use.
Natural Liquid Fertilisers
Going back to nature, the old traditional ways, long before chemicals were introduced, fertilizers were made from plants like nettles and comfrey. They are quite effective because the nutrients are released into the soil very quickly. Liquid feeds are quite easy to make. All sorts of plants and herbs can be used. There are several ways of making your own liquid fertilizer.
Soak plants in water for a few weeks and keep covered. During this time fermentation takes place as foam gathers on top.
Soak plants in cold water for 24 hours, then bring to the boil and simmer on a low heat for 20-30 minutes. Allow to stand overnight.
Another method is to soak plants in cold water for a few days then strain before it ferments.
As Tulasi is a perennial plant and grows outdoors naturally in the warmer regions of Asia, she will only survive our colder climates in green house conditions. Here she continues to stay green rather than completely losing all her leaves. Tulasi will have her fall like most tress and bushes mostly during the winter months. It is at this time she will reduce the rate of producing Manjaris.
During the late autumn decrease her feed and iron intake by half the quantity and apply only once a month. During the winter months stop altogether as she is receiving her rest. Begin again in spring.
Lighting
Tulasi devi is at her best in natural sunlight. The required amounts are between 4-5 hours of direct sunlight daily. Plants that do not receive sufficient sunlight grow spindly as they are trying to reach areas where there is more light, rather than the shade they are growing in.
Symptoms: Thin weak stems and branches with long tem lengths between the pairs of leaves, and large pale green leaves. If the plant suffers with severe sunlight deprivation, it will be under so much stress that the leaves will drop off and the branches will abort. It is essential to use artificial light on overcast days where there is little or no natural sunlight.
So! Which lighting does Tulasi need?
First let’s take a look at light rays. Fluorescent tubes give off red and blue rays, whereas incandescent light gives off red and far-red. For plants this means that the blue rays excite the foliage action and the red rays work on flower growth. So when you combine natural light with artificial, the rays increase and the plants or flowers receive what they need.
Plant growth lamps are easily available with names like “Gro-lux” or “Plant Light”. Daylight tubes and Grow-lux are a good combination. Fluorescent tubes can come in a variety of different lengths, intensities and quality of light. Plants like Tulasi grow well with a cool-white fluorescent because the foliage can be as close as 3-4 inches without burning from the high intensity. However incandescent house light (which is not very effective) would need to be 12-18 inches above the plant or they will burn.
So to recap:
If Tulasi is not receiving up to 4-5 hours of natural direct sunlight daily, she will need assistance from cool white fluorescent tubes and daylight tubes or grow-lux tubes with day light tubes which will provide the wavelengths needed for her growth. These lights are suspended over the foliage but need to be close to her approx. 4 inches, but not touching as this will burn her leaves. 12 hours of artificial lighting is equivalent to 4 hours of sunlight. Check frequently to ensure that the Tulasi branches and leaves are not touching the light tubes.
Asta-nama-stava
The Eight Names Of Tulasi Devi
vrndavani, vrnda, visvapujita, puspasara, nandini, krsna-jivani, visva-pavani, tulasi.
Vrndavani – One who first manifested in vrindavan.
Vrnda – The goddess of all plants.
Visvapujita – One who the whole universe worships.
Puspasara – The topmost of all flowers, without whom Krsna does not like to look upon other flowers.
Nandini – She gives happiness to everyone.
Krsna-Jivani – The life and soul of Lord Krsna.
Visva-Pavani – One who purifies the three worlds.
Tulasi – One who has no comparison.
Any one while worshipping Tulasi Devi chants these eight names will get the same result as one who performs the Asvameda Yagna and one who on the full moon-day of Kartik (Tulasi Devi’s appearance day) worships Her with this mantra will break free from the bonds of this miserable world of birth and death, and very quickly attain Goloka Vrindavan. On the full moon-day of Kartik Lord Krsna Himself worships Tulasi Devi with this mantra.
One who remembers this mantra will very quickly attain devotion to Lord Krsna’s Lotus Feet. [Gita-Mahatmya and Tulasi devi Mahatmya of Padma Purana.]
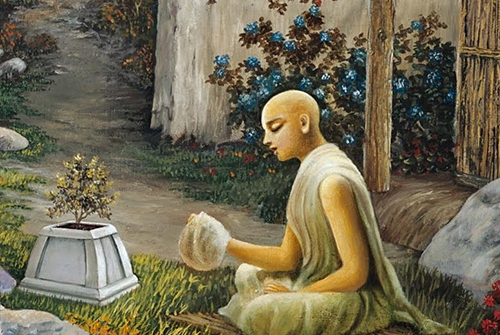
Quotes from Srila Prabhupada on Srimati Tulasi Devi and picking leaves.
“Tulasi leaf is very, very dear to Vishnu. All Vishnu-tattva Deities require profusely Tulasi leaves. Lord Vishnu likes garlands of Tulasi leaves. Tulasi leaves mixed with sandalwood pulp and placed on the lotus feet of the Lord is the top most worship. But we must be very careful that Tulasi leaves cannot be placed on the feet of anyone except Lord Vishnu and His different forms. Tulasi leaves cannot be placed even on the lotus feet of Radharani or on the lotus feet of the Spiritual Master. It is entirely reserved for being placed on the lotus feet of Krsna. We can place, however, Tulasi leaves in the hands of Radharani for being placed on the lotus feet of Krsna, as you have seen on the Govinda album.”
I am giving herewith three mantras for Tulasi devi as follows:
vrndayai tulasi devyai, priyayai kesavasya ca
vishnu-bhakti-prade devi, satyavatyai namo namah
I offer my repeated obeisances unto Vrnda, Srimati Tulasi Devi, who is very dear to Lord Kesava [Krsna]. O goddess, you bestow devotional service to Krsna and possess the highest truth.
This is offering obeisances, bowing down (pancanga pranam). And when collecting leaves from the plant, the following mantras should be chanted:
tulasi amrta-janmasi, sada tvam kesava-priya
kesavartham cinomi tvam, varada bhava sobhane
O Tulasi devi, you are born from nectar, and you are always very dear to Lord Kesava. Now in order to worship Lord Kesava I am collecting your leaves and manjaris. Please bestow your mercy upon me.
Then the mantra for circumambulating the Tulasi tree:
yani kani ca papani, brahma-hatyadikani ca
tani tani pranasyanti, pradaksinah pade pade
“So there are three mantras, one for bowing down, one for collecting the leaves. The collecting of leaves should be done once in the morning for worshipping and for putting on the plates of foodstuffs to be offered. On each bowl or plate there should be at least one leaf. So you follow and practice these Tulasi affairs and you try to distribute your experience to all the other centre’s, that will be a new chapter in the history of the Krsna consciousness movement.”
(Srila Prabhupada to Govinda dasi, 7th April, 1970)
Srimati Tulasi Devi is Srimati Vrnda Devi’s beautiful and graceful, partial expansion in this material world.
There are two types of Tulasi: Krsna Tulasi, which has purple colouring in the leaves and stems and Rama Tulasi with green leaves and stems. Both of these Tulasi are used in the worship of Lord Krsna.
Service to Srimati Tualsi devi is performed with the same high level standard that is used to serve the Deities on the altar. Srimati Tualsi devi is a pure devotee of Lord Krsna. Pujaris are requested to shower and wear clean clothes when performing any service for Tulasi in the temple, greenhouse or grown at home.
Problems can occur for several reasons. These range from too much or too little of some vital growth factors which are: an imbalance of light, water, humidity, temperature, soil, feeding, infiltration of insects and fungus. It helps to have some knowledge on caring for plants. A balanced combination of sensitivity and a desire to nurture puts us in deeper contact with nature and increases sensitivity to the environment where Tulasi is b being grown.
All these things aside, when sickness strikes, what is required is a methodical approach to find the cause and to take effective measures to remove or reduce the problem.
This can be done by working with the section of identification of pests and the check-list of possible problems and their cause. Also by comparing a sample of a sick or diseased Tulasi against the information given.
To the inexperienced Tulasi grower in time, confidence, sensitivity and skill will increase. To the experienced gardener, I hope you enjoy this booklet.
Check List
Nitrogen deficiency?
Symptoms: Stunted growth, pale leaves, occasional red discoloration.
Treatment: Apply feed containing nitrogen. (Maxicrop Complete Garden Feed, or Miracle Grow). Use also as a foliage spray every two weeks until conditions improve.
Trace Element deficiency?
Potash
Symptoms: Poor resistance to disease, marginal leaf scorch.
Magnesium
Symptoms: Discoloration (yellowing) begins on lower leaves and moves upwards until all foliage is affected.
Manganese
Symptoms: Yellowing of leaves, starts on young leaves as well as old leaves and leaf edges inwards and appear scorched.
Treatment: Apply a Multi-Tonic Once a season which contains all the trace elements: Magnesium, Manganese, Iron, Boron and Molybdenum. Spray with a foliar spray containing the above trace elements.
Over-watered?
Symptoms: Leaf tips or Manjaris brown, leaf colour pale and yellowing. Are leaves dropping?
Treatment: Check the root ball. Are there signs of sogginess? Root rot comes when water fills all the air spaces and the plant suffocates. Take away the present soil and change for fresh. Do not let pot sit in water.
Under-watering?
Symptoms: first sign is a dull leaf colour, followed by the leaves wilting becoming brittle and unyielding. Has the pot been allowed to dry out for too long? Is the atmosphere too arid?
Treatment: see section on Watering.
Green leaves falling off?
Possible cause: left to dry out, then upon watering Tulasi’s roots go in to shock. Too much fertilizer, fumes or drafts?
Treatment: regulate watering and feed. Check position.
Light starvation?
Symptoms: leaves too far apart, stems leggy? Growth thin and weak, new leaves small.
Treatment: place in direct sunlight or window sill. If very sickly, leave lights on longer to give a boost.
Edge of leaf brown or reddish?
Possible cause: too much sun and heat through glass, not enough shade? Too much fertilizer, toxic to roots?
Treatment: wash the soil through with plenty fresh water at room temperature. Check correct measure of feed.
Yellowing of leaves?
Possible cause: not enough light (especially if the stems are spindly). Temperature too high at night? Overfeeding or too little feed? The soil is tired. In need of re-potting?
Treatment: first check the root system to se if she needs re-potting. Then check the temperature for the time of year. Check the last time she received feed against the time of year or season. Summer Feeding – every two weeks. Winter – no feed at all. If in the spring season, apply Trace Elements. Give Iron every two weeks, alternating each week with the feed.
Curling leaves?
Possible cause: humidity too low, temperature too cold.
Treatment: Spray with water every morning. Check temperature.
Is the whole plant sagging?
Possible cause: in need of re-potting? Has Tulasi gone into shock due to cold weather and drafts? Left to go too dry over a long period? Needs support sticks? Too much fertilizer?
Treatment: check the above and adjust as necessary.
Wilting?
Possible cause: check for Die-Back. Is the pot standing in water or does she need water? Has the Tulasi stood in the sun too long or near the heat radiator? Was cold water used? (Remember it should be room temperature). Too much fertilizer?
Treatment: check above and adjust as necessary.
Moss on top of the soil?
This is not a common complaint for Tulasi as her needs are for much dryer soil, but if it does occur scrape it away, check to see if the soil is compacted and apply a light dressing of new soil. Check to see if there is too much humidity. Dry white areas may indicate hard water residue or an accumulation of salts from the fertilizer which the Tulasi can’t use.
Fungus?
Possible cause: too much moisture? Humidity? Yellowing and round brown spots appear on the leaves?
Treatment: Pick off affected leaves and burn. Dust lightly with sulphur, which can be purchased at plant nurseries. Reduce moisture and increase air circulation.
Root-Rot?
Possible cause: Several fungal diseases can effect the root system, also poor drainage. With root-rot, the tap root turns black and the Tulasi leaves suddenly go limp and wilt (this is known as Die-Back). This wilting starts from the top of the foliage working its way down the branch.
Treatment: Cut back the diseased, dead branch to save the rest of the bush. Re-pot using fresh soil. Take away as much of the diseased root as you can. Keep the pot warm. Prevention is to avoid over watering.
Biological Pest Control
General information
Biological control is the use of predatory and parasitic insects species (natural enemies) against insect pests on crops. It aims to establish natural enemies, on initial low pest infestations so as to prevent the pest developing to levels where economic damage occurs. The pest is maintained at that low level or even eradicated. In this way risk of any over wintering pest population, which may be a source of reinfestation the following year, is minimized. Application techniques should be directed at achieving this aim.
Note: Aphids, Capsid Bug, Leaf hopper and Mealy Bug are all Sap Feeders.
Identification
Capsid Bug, Capsidae
Whitish or greenish insects, rather like largish aphids. There are several types. Plants become weakened and leaves are distorted.
Leaf hoppers, Cicadellidae
Pale green or yellow insects 2-3mm long which resemble aphids and capsid bugs. When disturbed they will leap from leaf to leaf or nearby plants. Leaf hoppers suck the juice from the leaf, causing white mottling on the top of the leaves.
Mealy bugs, Pseudococcus
Troublesome greenhouse pests. They are pinkish, grey-white oval shapes usually bundled up in a woolly white jacket which defies water. They hide in joints and against stems, sucking the juice from the leaves and stems, rapidly multiplying 600 eggs at a time. Watch for yellow specks and a general yellowing plus a deforming of the Tulasi. Mealy bugs also produce copious amounts of honeydew which allows sooty mould to grow, together with waxy threads, making the plants unsightly. Cryptoleamus Australian ladybird feed on mealybugs.
Scale
There are two main types of greenhouse scale insects. Soft scale and armoured scale. The soft scale is oval, flattened and green brown in colour. The fully grown insects is 3-5mm long and can infest a wide range of plant types. The insets produce large amounts of honeydew leaving the infested plants sticky and invariably covered in a black sooty mould. The biological control of soft scale can be achieved by introducing the small parasitic wasp, Metaphycus, which lays its egg into the scales. Glasshouse use only. As yet no biological solution to armoured scale is available.
Aphids
Aphids float in on the breeze from outside and head for the choicest young leaf. Watch for leaf curl and check under the foliage. These wingless insects are about an eighth of an inch long, pear-shaped and may come in several colours. Sticky stems and leaves (caused by the aphids sucking action) attract ants, who in turn carry the aphids from plant to plant. Sooty black fungus is also attracted to the sticky parts.
Introduce the small black parasite, Aphidius, which kills young aphids.
Thrips, Thysanoptera
These are chewers an eighth of an inch long which will strip a leaf to a skeleton. Small, narrow insects from pale yellow to black in colour.
Red spider mite (tetranychus urticae)
Red Spider Mite is a small greenish coloured mite with a dark blotch on each side of its body. Each adult female lays up to 120 round translucent eggs over a period of three weeks. At summer greenhouse temperatures, these hatch and develop into adults within 14 days, resulting in rapid population increase. Mite colonies feed on the underside of leaves, sucking out the green cell contents and leaving a speckled appearance. In the autumn, female mites seek hibernation sites in the green house structure and fittings. At this time their colour changes to a deep red. Re-invasion occurs in the spring when warmer weather temperatures and increasing daylight induce their emergence from the winter quarters.
Tarsonemid mites
These mites are minute, whitish-brown. They infest the developing leaves at the shoot tips, distorting the manjari buds which then go brown and stunted. They can be seen only under a microscope.
White Fly, Trialeurodes vaporariorum
A small, moth-like insect, considered one of the most serious and difficult pests to control under glass. Eggs are laid on the underside of young leaves which, after a week, hatch into small, motile scales (crawlers). These soon settle down to develop through several stages, and emerges as adults some 28-30 days after eggs were laid. The adults settle onto new growth and feed for three days before the female commence egg-laying. Both the adults and the scales are potential virus carriers and as a result of feeding, they produce “honeydew” on which sooty mould grows. The “honeydew” is often the first sign indicating the presence of whitefly.]
Wood Louse
Wood louse feed on dead wood and can be found underneath the pot. If they get on top of the soil they will cause damage to seedlings.
Hover Flies
Black and yellow stripped abdomen, they are friendly as they feed on Green-fly and Aphids.
Whitefly Parasite, Encarsia Formosa
Encarsia is used to combat whitefly. It is a small chalcid wasp (1.5mm long), easily recognized by its black thorax and bright yellow abdomen. Each female can lay more than 60 eggs in 10-14 days, inserting them individually into whitefly scales before the scales reach the waxy, pupal stage. Development takes place inside the scale which turns black when the whitefly has been consumed and the parasite pupates. When fully developed the adult “Encarsia” emerges by cutting a hole in the top of the scale. Parasite activity and development is dependent on the temperature being 21 days at 21° Celsius, and will be much slower as the temperature decreases. The adult wasp can also kill the young “crawler” stage of the whitefly by probing it with its ovipositor.
Spider Mite Predator, Phytoseiulus persimilis
A small mite, a little larger than its prey, with a rounded shiny orange body. Each female adult is very active in searching for its prey, and will lay 50 or more eggs over a periond of three weeks. At 22 degrees Celsius these develop into adults in only 7-8 days, twice as fast as its prey at a similar temperature. These predators need humidity, so they work well in the Tualsi greenhouse.
To clear soft brown Scale-Aphids-Bugs and Mites using Horticultural Soap, Savona.
Use Savona liquid soap and distilled water or rain water (for the correct dosage follow label on the bottle). If water goes a milky cloudy colour, empty it out and start again as it will not be very effective. Bathe leaves and stems with cotton wool and Savona solution. Gently wipe off scale, taking care not to damage wood. Spraying with savona, which is a fatty acid, once a week serves as a preventative as scale are unable to breed. Mites are unable to stick their egg sacks under the leaves.
Ready prepared “Pest Pistol” is 100 percent natural and comes in a spray bottle. Use like Savona.
Natural Alternatives
Natural sprays are available today for the organic gardener. These natural chemicals are gathered from certain plants as an alternative to the highly toxic, damaging chemicals sprays.
Savona soap
This is a concentrated soap (containing natural fatty acids) diluted with rain water or distilled water. Used as a preventative to spider mite, white fly and aphids.
Pest Off
Ready made solution, in a spray bottle, works the same as Savona. Very effective.
Pyrethrum
This is made from pulverized Chrysanthemum flowers and comes in a spray bottle. Effective against aphids, whitefly and leafhoppers. Apply in late afternoon or evening. Not recommended to use with Savona.
Rotenone
This is from the root of the Derris plant and although it sounds unpleasant, it works as a stomach poison on aphids, spider mites and ants.
Rubbing alcohol
Can be found in a chemist. Mixed 3:1 or applied full strength, then washed off with water. It is effective against some soft bodied insects and fungi.
Talcum powder
Ants do not like to cross over talcum powder. To prevent them getting into the pots, just sprinkle on the floor around the outside of the pots. It will need to be done regularly.
Hot Chilli peppers
Mixed with water, will discourage chewing insects.
Lupin
The juice of crushed lupin, painted around the base of the Tulasi stem, will ward off ants, preventing them from climbing into her branches.
Penny Royal
Also a great ant repellent. Grow next to ant nests and watch them pack their bags.
African Marigold (cracker Jack)
The aroma makes a repellent for white fly. Grow one or two small pots near Tulasi.
Bach Flower, Rescue Remedy
Add to spray bottle or watering for any sign of shock.
Conscious Thought!
Comes in prayer form. Take a tip from the Findhorn Society. All living creatures have consciousness. Talk to the presiding pest, ask it to please locate to another area. It works!